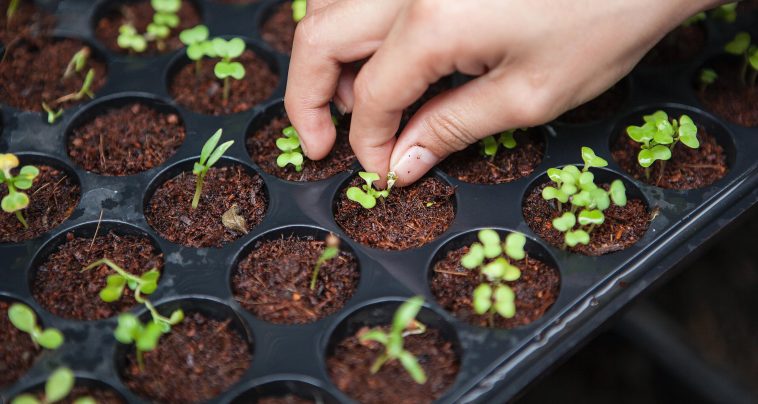
The stage between sowing and the appearance of the first true leaves is crucial, and many seedlings are lost if conditions are not favourable. Many crops are sown directly in the field of production as described in the previous issue, while others are sown in nursery beds or trays, and transplanted to the garden later.
The following table shows which crops should be sown in nurseries and which should be sown directly in the garden or field.
A nursery for crops that are sown in nursery beds and then transplanted should have:
- good soil, improved with compost, kraal manure, and inorganic fertilisers;
- a reliable water supply (small nurseries can be watered with a watering can);
- shade netting, or a home-made shade roof; and
- be close enough to the garden that seedling transportation will be easy.

Table 1: Sowing depth and methods of some crops.
Preparation of nursery beds
There are a variety of ways to prepare a seedbed for the nursery, but the following are the most popular:
- Add organic matter as well as inorganic fertiliser. Apply 60 grams of compound fertiliser per square metre (2:3:2). Incorporate the fertiliser into the top 10 centimetres of soil. The growing seedlings will receive nutrients from the organic debris and inorganic fertiliser. Remove any large dirt or stone lumps.
- At this point, the seedbeds should be properly irrigated, and the weeds should have emerged after two weeks. If you skip the waiting phase, you’ll have to do more weeding while the seedlings grow.
- The seedbed is raked properly before sowing to ensure that it is flat and has a fine tilth. This keeps seeds in close contact with the soil particles that provide the moisture they require.

Figure 1 – Sowing in nursery beds: Rake the soil, mark out drills, sow the seed carefully, lightly cover with earth and firm down. (Ministry of Agriculture, Water and Rural Development).
Sowing in nursery beds
- can with small holes punched in the bottom to water the seedbed. Until the seeds emerge, the soil should always be kept moist. This usually requires watering daily. Watering can be reduced once adequate growth has occurred.
- Excess seedlings should be removed three weeks after germination to allow proper root growth for the remaining well-spaced plants. Plants that are single are easier to transplant without causing damage to the root system.
- Keep weeds out of the area around the seedbeds, as weeds can serve as homes for insect pests. In any case, keep an eye out for insects that could harm the seedlings overnight. Grasshoppers, cutworms, and caterpillars should be removed or treated as needed.
Instead of nursery beds, seedling or germination trays can also be used to grow the seedlings before transplanting them. These trays can quickly dry out, so it is important to keep them moist with a fine mist spray. Good seed companies will also be able to provide prepared germination or seedling grow medium to fill the trays.

The seedling on the right is ready to be planted.
Preparing the growing beds
Prepare the beds as follows at least six weeks before transplanting:
- Incorporate the manure and lime into the soil. Ensure that the manure and lime are completely covered.
- Bury smaller weeds at the same time. Turn them upside down. This kills the weeds while also enriching the soil with humus.
- After digging, let the soil rest for a while. The lime will begin to work once the manure has rotted. Air and water can now easily pass through. They are both required for root and soil organism growth. Plant nutrients are dissolved in soil water, which the roots absorb. Hardening off and transplanting
- Reduce the watering and shade a week before the plants are due to be transplanted to harden them off. The transplanting shock will be reduced because of this hardening off process.
- Transplanting should be done on a rainy, cloudy day or late in the afternoon to give the seedlings a cool environment to recover from the transplant.
- Water the nursery beds a few hours before lifting out the seedlings. This will soften the soil and allow the plants to absorb water before being transplanted.

Mechanical transplanter for seedlings.
- Seedlings are carefully dug out of the dirt and placed in a basket or tray one at a time. Then they are moved to a garden that really is ready to receive them. Make sure to lift out a small number of seedlings at a time, as they will begin to wilt as soon as they are out of the soil.
- Place one seedling into each planting hole. Use the proper transplanting depth for each crop.
- Water the plants after they’ve been transplanted. If small branches are available, provide some shade for each seedling. During the first week following transplanting, the seedlings must have some shade available. The shade must be removed after about a week.
- For the next couple of days, while the seedlings are in this delicate stage, it is important to water regularly and keep a close watch on the seedlings.
The information in this article is credited to the Namibia Agricultural Union and Namibia National Farmers Union who published the Crop Production Manual in 2008.


